

Repair on any smartphone is one of the most frustrating things for the average user to encounter. More often than not, most simply give up and get a new device rather than do what sometimes comes out to be an easier, and cheaper repair. More often than not, any sort of self-repair ends up voiding any warranty. However, self-repair is often the only choice a consumer has if their device is purchased secondhand, especially if you are working on a device that is, frankly, not worth the cost to send into Apple to have repaired to begin with.
So, to help those out who need some basic repairs, we here at mobiletweaks.net have brought together some of the best know-how to help you, our readers, in those repairs to your well-loved iPhone.
We will start with one of the latest versions of the iPhone, the 5S, and what you need to do if the screen cracks or breaks and needs to be replaced. Keep in mind that as always, any damage done to your device in an attempted repair while reading this guide is not done at the fault of mobiletweaks.net. Use at your own risk and remember that this sort of thing shouldn’t be undertaken with someone with little to no tech know-how.

Replacing the screen on an iPhone 5S is not a difficult task if you have a good guide and the right tools. Basic knowledge of how electronics are put together is a plus, but not necessary. First off, you will need a handful of tools and parts, some required and some simply suggested, however this method of replacing the screen pretty much requires everything listed to get the job done right and the parts and tools themselves are inexpensive and handy to have for other situations.
- Razor Blade
- Spudger Tool
- 5-point security screwdriver
- #000 Phillips Screwdriver (standard)
- A Suction Cup small enough to fit your screen and, finally…
- A new replacement 5S screen.

The most expensive item on this list will be your replacement screen, with most other things coming in at a fairly cheap price, depending on where you buy them. Most of the time with the screen you’re going to end up coming in at about $70, though that often includes a 90-day warranty. If you can find one for cheaper without, feel free to go that route. As long as it is a 5S screen of one of the two corresponding colors, black or white, you will be just fine.
The first step in any repair, beyond gathering your tools and parts, is turn your device off. This keeps you from getting shocked and possibly keeps you from damaging your device anymore by accident.
Using the 5-point screwdriver, remove each of the screws beside the docking connector on the bottom of your 5S. Make sure you keep up with these screws, though don’t worry about mixing them up. These screws hold the screen to the frame of your iPhone.
Using the suction cup mentioned above, press it down and secure it to the broken screen just above the Home Button. Make sure it is tightly secured before moving on. If your screen is too broken for the suction cup to grip firmly, use the razor blade to lever the display away from the housing, but be careful not to cut yourself or your iPhone in the process.
Very gently lift upwards with the suction cup on the screen until the bottom of the screen is freed from the housing. DO NOT however pull the screen completely away as the Touch ID is still attached to the rest of the phone through a small ribbon. Pull it apart a small distance and once you can see the ribbon clearly, use the edge of the spudger tool to very gently remove the cover that houses the Touch ID ribbon. Like the 5-Point screws before, do not lose this metal cover and set it aside somewhere safe. Disconnect the ribbon with your spudger tool.
Once the ribbon is disconnected, lift the display upwards the rest of the way, but do not pull it completely away from the housing as it is still connected via a ribbon cable to the rest of the phone. Using the #000 screwdriver, unscrew the silver metal plate and set the four screws to the side.
Just like with the Touch ID sensor ribbon, use the spudger tool to remove the three cables that attach the screen to the housing. You should be able to pull the screen away completely now.
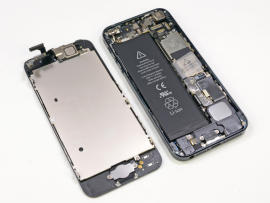
Given that screens come with none of the extra parts, such as the camera or speakers, you need to be prepared to switch those out from your old assembly.
Using the #000 screwdriver, remove the top right screw holding the Touch ID sensor to the display. Be careful not to damage the ribbon and pay attention to how the shield is oriented for replacement later. Fold back the ribbon and remove the two screws there to unseat the shield using the #000 screwdriver.
Using the spudger tool, very carefully remove the Home Button assembly. Be mindful of the adhesive that holds in. Set the entire assembly, Touch ID and Home button, aside. To reassemble the home button in the new display, simply follow these steps in reverse order.
Now, to move the front camera, earpiece, and heatshield, simply remove the three screws holding them to the display with the #000 screwdriver and set them aside. Loosen the earpiece bracket and lift it away. You should not have to pull hard, but you may have to bend the bracket outwards a little to allow it to pull away.
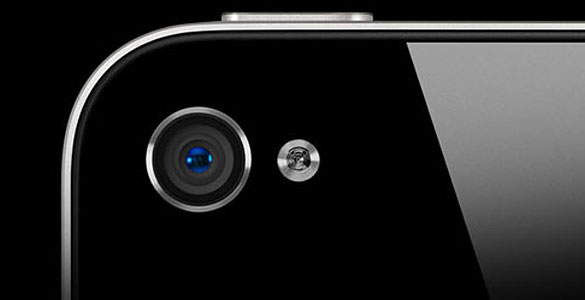
Gently unfold the front camera ribbon and pull the camera itself away from the display. Using the spudger tool, loosen the side of the cable from the display without pulling it away. Then, using the same screwdriver, remove the four screws holding down the head shield on the back of the display. In one piece, remove the heat shield and front facing camera. Use the spudger to loosen any adhesive you need to pull away.
To reassemble your 5S with your new display, simply follow these steps in reverse order, ending by reattaching the security screws at the bottom of the housing itself.
![]()