

Have you ever wanted to do more than just use an already made app, downloaded from Play Store? If yes, you might have inquired about the process of making an android app, but found out you need to know coding. However, the truth is that you do not. There is a very easy alternative to build an android app and it involves using other solutions of app making. Such solutions are Andromo or App Inventor, both easy to use and they do not require any prior IT experience. As simple as it is to make an android app with these programs, there are a few instructions you need to follow in order to be successful. To begin with, you need to choose between Andromo and App Inventor. Even though both of them have the aim of showing you how to build an android app without coding, there are slight differences between them. Therefore, you should choose the one that you understand the best and which you think is the easiest to use.
Andromo gives you the opportunity to create an android app without coding. What it actually does is saving you months of time of java coding, which the program does by itself in a matter of seconds. Moreover, Andromo lets you commercialize your app. You can make tons of money if the app becomes popular. There are users who reported having made over $10.000 a month.

Since Andromo runs only inside a website, there is no need for you to download any program. As you open the Andromo webpage, you will see that the interface divided into different tabs, each showing one step of the whole process. After completing each step, make sure you click the ‘Save Changes’ button which you can find at the bottom of the page. Important to mention is that you can leave the project at any time without losing it, provided that you saved it before. With these aspects in mind, here are the steps.
1. The first thing you have to do is to describe the app. Also, you have to choose an icon. You can go for the Andromo standard icon, but it is recommended that you make or upload your own. If you do not know how to make an icon, you can choose a pre-made one from the internet.
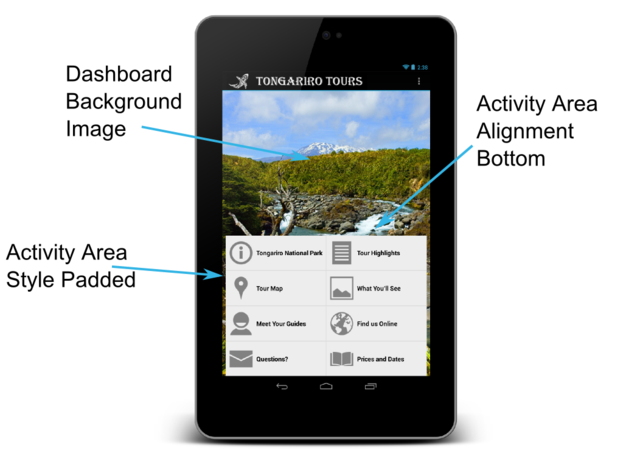
2. The second step aims to customize your app. You have to choose a style from the Dashboard tab to use as your background and you also have to decorate the homepage of your app. For this, you can upload images of your own or edit the given images from the website.
3. In this step the app starts to take shape. By going to the Activities tab, you define the main characteristics of your app by setting its’capabilities. Currently, Andromo offers 13 available activities, out of which 11 are free. Also, there are gold-activities available only to paying users. The activities are separated into two kinds: the first one which pulls in external data and all the other ones which display the data compiled in your app. Facebook, Flickr, YouTube, Twitter and Google Maps are the services from which Andromo can bring in external data. In order to add a page from the mentioned sources, you only need to paste the URL of the page you want to appear in your app. An exception is Flickr, from which you can add a certain picture or photo of an user by mentioning their User ID.
4. The next step continues to bundle up your app. After choosing activities, you need to add details at the next tab, About. Here you describe the app and yourself. For this, you can easily paste the URL of your Facebook page or another supported external service website. More than this, if you want to create an About Us or Contact Us page, you can use the Custom Page activity to write all the details you want and the HTML editor helps you to design the page. Another activity you should include is the Audio activity, which helps you to add tracks via the Andromo’s music player which has media controls or you can add a shorter audio track with sounds that will be played with the soundboard which lacks any media controls. However, you should be aware that the limit size of the audio file is 6MB and you can upload apps to Google Play of maximum 50MB. If you add too many activities, your app will be too bulky and will not run properly.
5. After you finish arranging your activities and background themes, you should double-check it before you go on. The next step is adding ads by going to the Ads and Analytics tab to choose your advertising options. The first ad mode is from Andromo and the second one is from AdMob. The third option is to turn off all the ads, but for this you need the Gold Package, which requires payment.
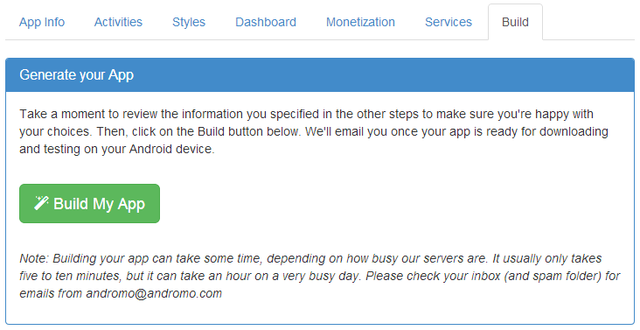
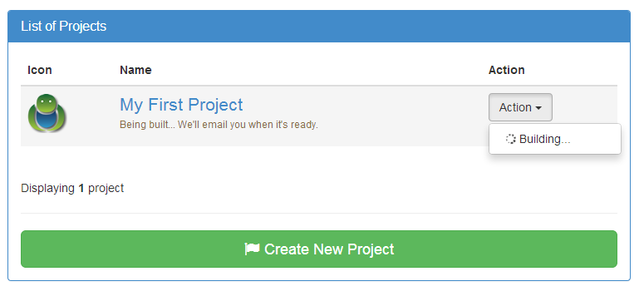
6. After carefully checking the background themes, colors, activities and ad options, you can go on to the Build tab. This means you are almost done. This tab will put altogether your selected options and will basically build your app for you (this is the part where you would need coding).
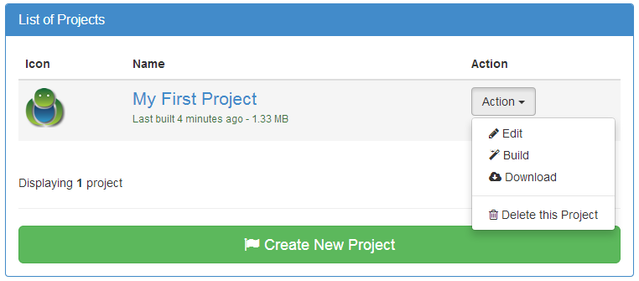
7. The final step is to download the app after it is finished from the URL Andromo will send to your e-mail. Also, you can copy the URL and share it with anyone you would like. If you want to share it with other Andromo users, you can go to the Showcase tab and add it there.
To conclude, you can very easily learn how to build an android app without coding by using websites specialized in app making. One of these is the very popular and efficient Andromo. You do not need any previous programing experience to build your own app, share it with others and even make money out of it. Therefore, you can search for any app maker and let your imagination create unique android apps of your own.
![]()